


Vinyl flooring has emerged as a popular choice due to its durability, adaptability, and visual appeal. Whether you're a seasoned DIY enthusiast or a professional installer, understanding the nuances of various installation techniques is essential to ensure a flawless and enduring outcome. In this guide, we will walk you through step-by-step instructions for three primary vinyl flooring installation methods: glue-down, click-lock, and loose lay.

Glue-Down Method: The glue-down approach involves affixing vinyl planks or tiles directly to the subfloor using adhesive. To begin, ensure the subfloor is clean, dry, and level. Any imperfections must be addressed, and any existing flooring removed. Allow the vinyl flooring to acclimate to the room's temperature and humidity for a minimum of 48 hours before installation. When applying adhesive, use a trowel as recommended by the manufacturer, working in small sections to prevent premature drying. Start placing planks in a corner, pressing them firmly into the adhesive. Continue this process, ensuring tight seams and proper alignment. Trim planks using a utility knife or vinyl cutter to fit edges and corners neatly.

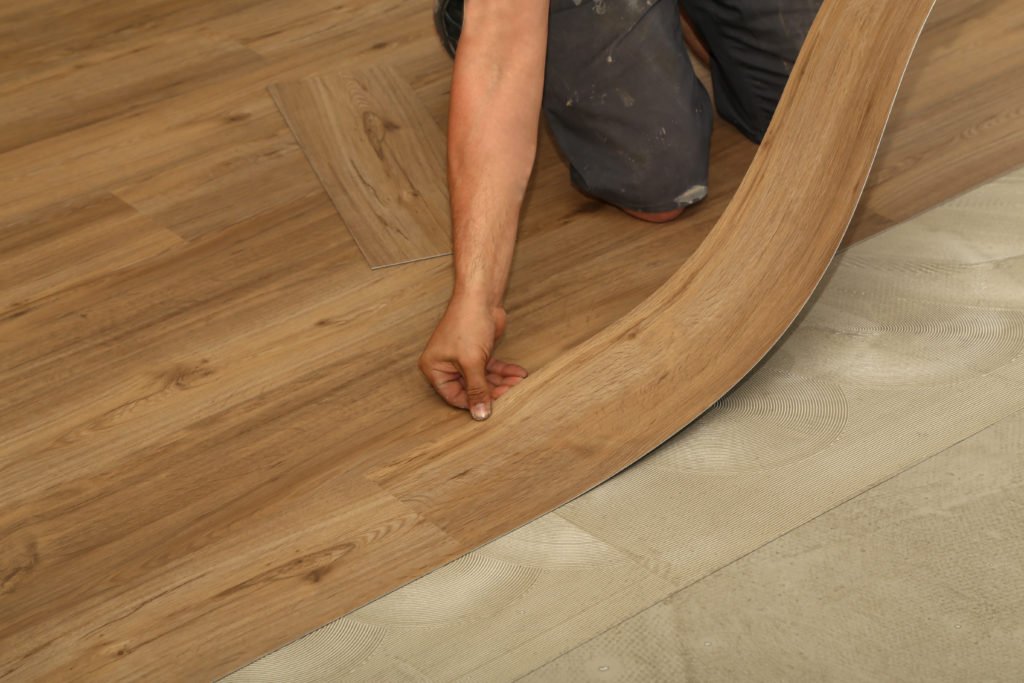
Click-Lock Method: The click-lock technique, often referred to as floating installation, involves interlocking vinyl planks or tiles without adhesive. Start by preparing the subfloor as you would for any installation. Begin with the long side of a plank against the wall, leaving a 1/4-inch gap for expansion. Spacers should be used to maintain this gap along all walls. Angle the next plank and insert its tongue into the groove of the first plank. Lower the plank to securely lock them together. Continue this process row by row. For the last row, trim the planks to fit the remaining space, leaving a 1/4-inch gap for expansion.
Loose Lay Method: The loose lay method entails laying vinyl flooring without adhesive or interlocking mechanisms. Begin with a clean and level subfloor. Lay the first row of planks along a wall, ensuring a small gap for expansion. Lay subsequent rows, aligning the planks tightly. To prevent movement, secure seams and the perimeter using double-sided adhesive tape. For the final row, trim planks to fit the remaining space.
In conclusion, your choice of vinyl flooring installation method should align with your proficiency, subfloor condition, and desired aesthetics. The glue-down method offers stability, the click-lock method facilitates a floating floor, and the loose lay method is perfect for quick or temporary installations. Regardless of your chosen technique, meticulous preparation, precise measurements, and a keen attention to detail are essential to achieving a professional finish that enhances both the visual appeal and functionality of your space. For lasting and seamless effects, especially in complex spaces, it's recommended to enlist the expertise of a professional installer.